How to Monitor Resource Contention with Kubernetes PSI Metrics (v1.36 GA)
Introduction
Pressure Stall Information (PSI) has been a game-changer in the Linux kernel since 2018, offering high-fidelity signals to detect resource saturation before it escalates into an outage. Unlike traditional utilization metrics, PSI reveals the actual time tasks spend stalled due to CPU, memory, or I/O contention, expressed as clear percentages. With the graduation of PSI metrics to General Availability in Kubernetes v1.36, cluster operators now have a stable, reliable interface to observe resource pressure at the node, pod, and container levels. This guide will walk you through enabling, interpreting, and leveraging PSI metrics to keep your workloads healthy and responsive.
What You Need
- A Kubernetes cluster running v1.36 or later
- Nodes with Linux kernel 4.20+ (PSI support is built-in starting from kernel 4.20; default on most modern distributions)
kubectlinstalled and configured to access your cluster- Basic familiarity with Kubernetes metrics and monitoring tools (e.g., Prometheus, Grafana)
- Optional: A test workload to simulate pressure (e.g., stress-ng)
Step-by-Step Guide
Step 1: Verify Kernel and Kubelet Support
PSI must be enabled at the Linux kernel level. Most modern kernels have it enabled by default (psi=1). Confirm with:
cat /boot/config-$(uname -r) | grep CONFIG_PSIIf you see CONFIG_PSI=y, you're good. Next, ensure your Kubernetes version is v1.36 or higher. Run:
kubectl version --shortThe Kubelet feature gate KubeletPSI is enabled by default in v1.36, but verify via the Kubelet configuration or check the metrics endpoint later.
Step 2: Enable PSI Metrics in the Kubelet
In Kubernetes v1.36, the KubeletPSI feature gate is stable and enabled automatically. No manual action is required unless you upgraded from an older version where it was alpha/beta. Optionally, you can confirm the feature gate status on each node:
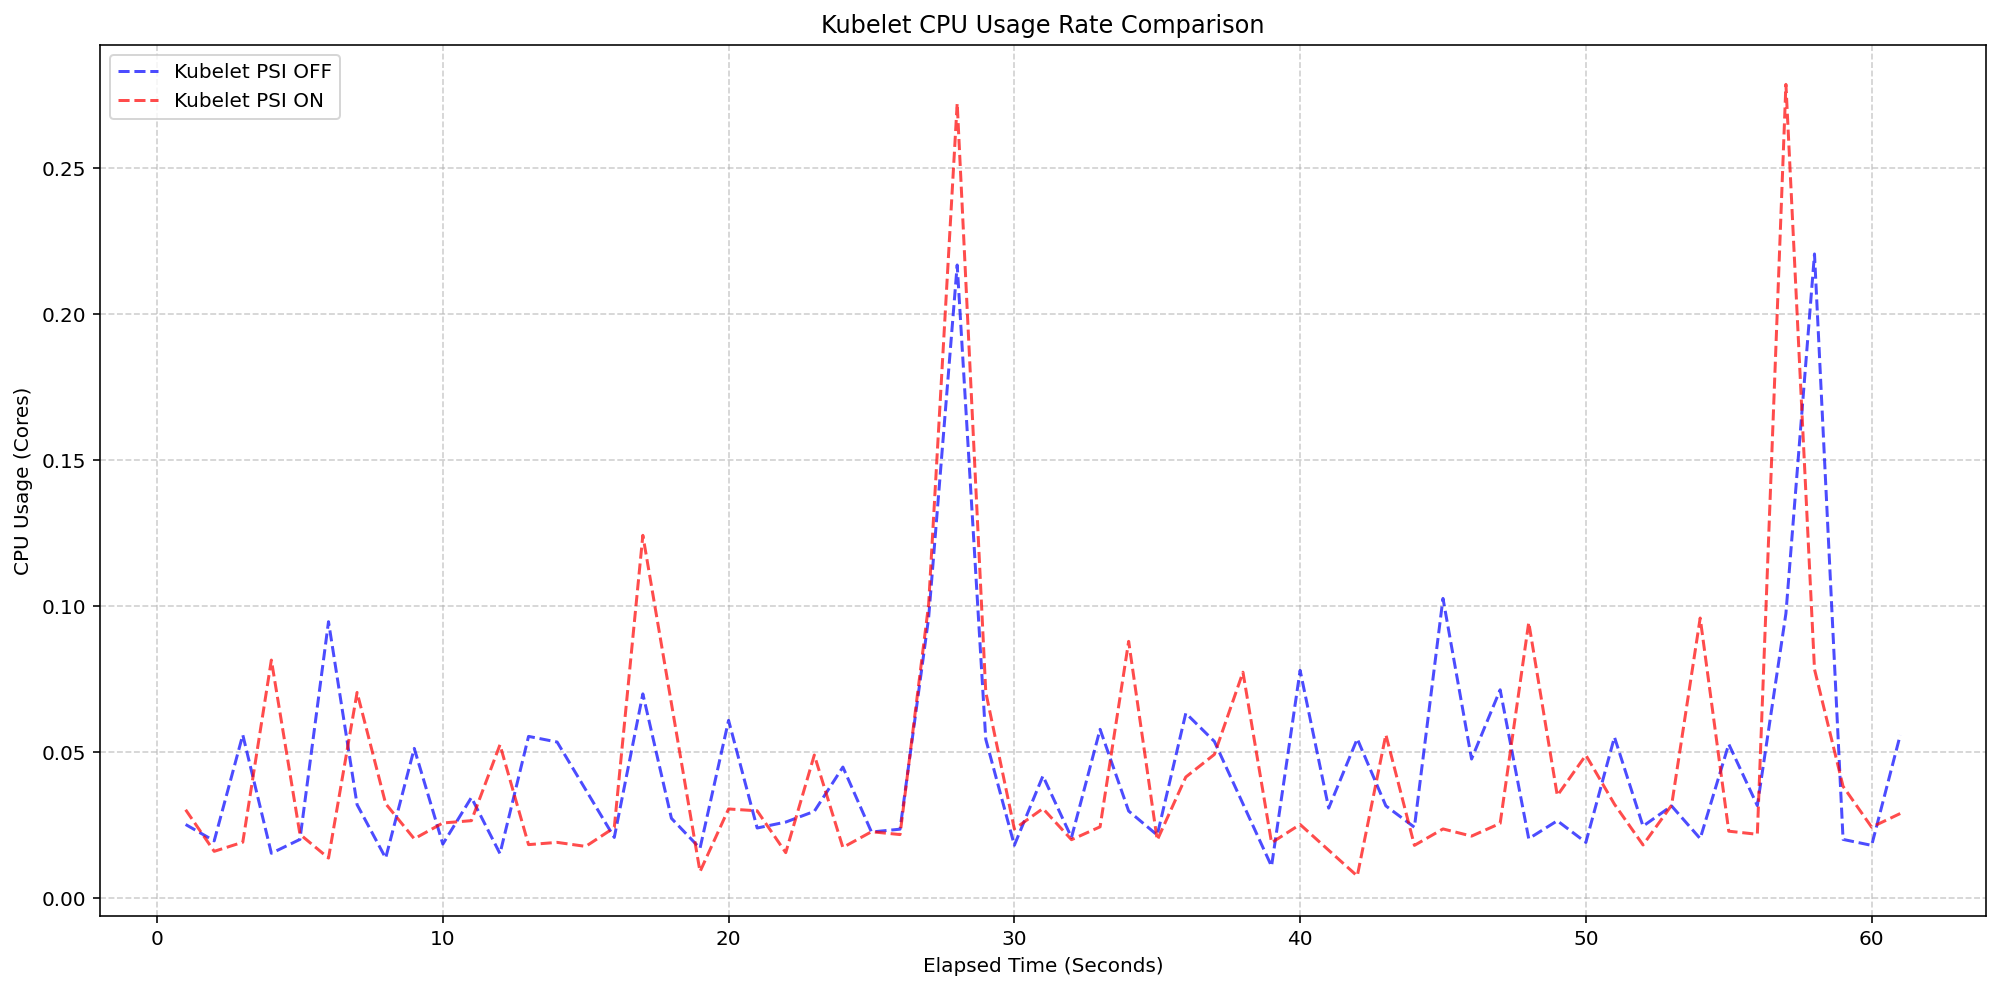
kubectl get nodes -o yaml | grep -i psiAfter confirming, the Kubelet will start collecting PSI metrics from the cgroup v2 interface (if available) or from /proc/pressure/ for system-wide metrics. The collection overhead is negligible—performance testing during GA validation showed the Kubelet uses about 0.1 cores (2.5% of a 4-core node) even under high-density workloads (80+ pods).
Step 3: Access PSI Metrics via the Metrics Endpoint
Kubelet exposes PSI metrics under the /metrics endpoint. Use port-forwarding to access it:
kubectl port-forward node/<node-name> 10250:10250 -n kube-systemThen curl the endpoint (you may need to provide authentication tokens):
curl -k -H "Authorization: Bearer $(cat /var/run/secrets/kubernetes.io/serviceaccount/token)" https://localhost:10250/metrics | grep psiYou'll see metrics like:
node_pressure_cpu_waiting_seconds_totalnode_pressure_memory_stalled_seconds_totalnode_pressure_io_stalled_seconds_totalnode_pressure_cpu_waiting_seconds_total_10s(moving averages for 10s, 60s, 300s windows)
Pod-level and container-level metrics are also available if cgroup v2 is used.
Step 4: Interpret the Metrics
PSI metrics come in two forms:
- Cumulative totals: Absolute time (in seconds) that tasks spent stalled due to the resource. Useful for understanding total impact over time.
- Moving averages: Percentages over 10s, 60s, and 300s windows. The 10s window helps detect short-lived spikes; the 60s and 300s windows reveal sustained pressure.
For example, a 10s average of 20% for CPU pressure means that over the last 10 seconds, tasks were stalled 20% of the time waiting for CPU. This is more informative than plain CPU utilization which might show 80% but hide scheduling delays.
Step 5: Set Up Monitoring and Alerts
Integrate PSI metrics into your monitoring stack. For Prometheus, add a scrape target that includes the Kubelet metrics. Create alerting rules like:
groups:
- name: psi-alerts
  rules:
  - alert: HighCPUPressure
    expr: node_pressure_cpu_waiting_seconds_total_10s > 0.5
    for: 5m
    labels:
      severity: warning
    annotations:
      summary: "CPU pressure > 50% on {{ $labels.instance }}"
Adjust thresholds based on your workload sensitivity.
Step 6: Validate with a Test Workload
To confirm PSI metrics are working and understand their behavior, generate controlled pressure. Install stress-ng on a test node:
kubectl run stress --image=alpine --command -- sh -c "apk add stress-ng && stress-ng --cpu 4 --timeout 60s"While it runs, watch the PSI metrics. You should see the 10s average spike. This exercise also helps you calibrate baseline vs. unhealthy values for your environment.
Tips for Production Use
- Start with system-wide metrics: Node-level PSI gives you an immediate health check. Once comfortable, drill down to pods and containers using cgroup v2 metrics for finer granularity.
- Combine with traditional metrics: Use PSI alongside CPU/memory utilization to avoid false negatives—e.g., low CPU usage but high PSI indicates scheduling contention.
- Monitor overhead: Performance testing confirmed Kubelet overhead is minimal (< 0.1 cores, ~2.5% of 4-core node). However, on very small nodes (1-2 cores), still monitor Kubelet resource usage during deployment.
- Use moving averages wisely: Rely on the 60s or 300s window for alerting to avoid noise from transient spikes; use the 10s window for real-time dashboards.
- Kernel configuration: Ensure
psi=1is set in kernel boot parameters (it usually is). Some cloud providers may disable it; verify via/proc/pressure/existence. - Graduation confidence: The GA validation included high-density scenarios (80+ pods per node) across various machine types, proving stability. You can trust PSI metrics for production decision-making.
By following these steps, you'll be able to proactively detect resource contention before it impacts your users, thanks to the power of PSI metrics now mature in Kubernetes v1.36.
Related Discussions